Requests are either created by Timebank Admins – for community tasks that need to be performed or by Users who need help from the community for things that they need to be done.
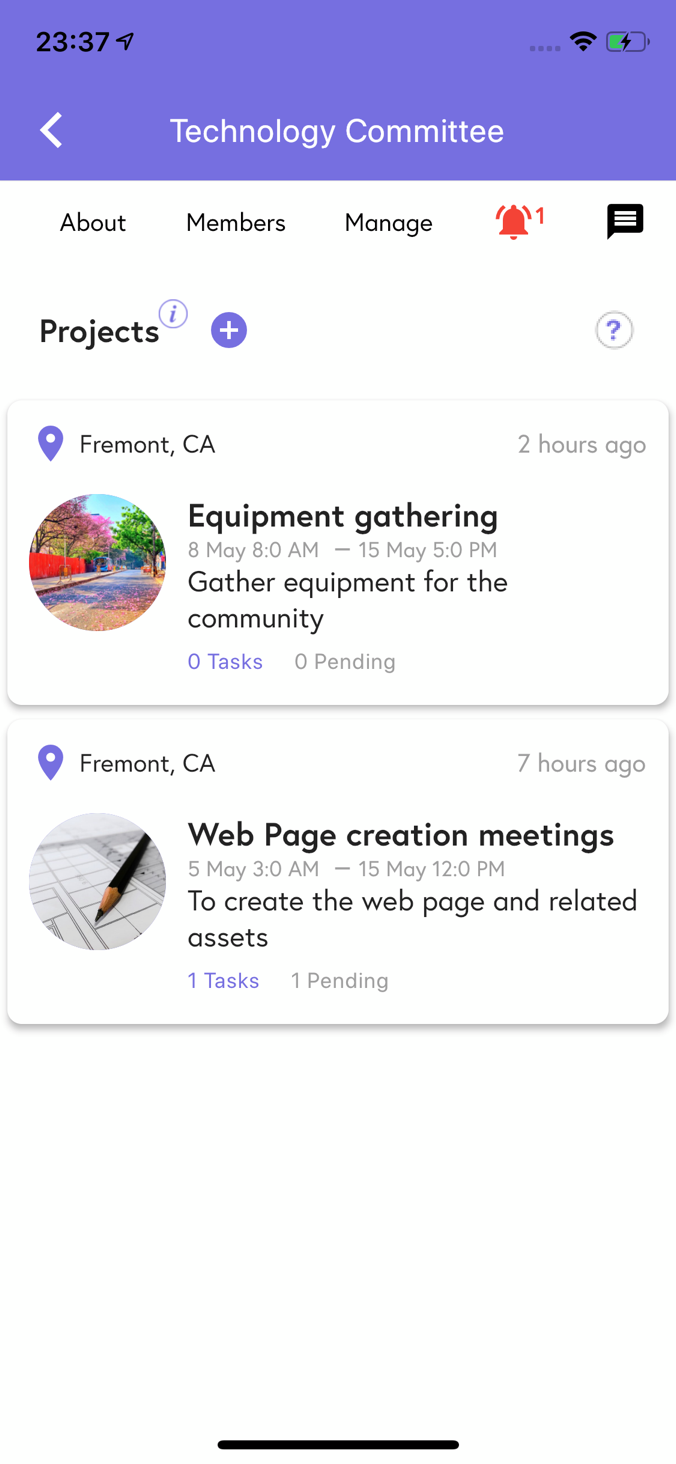
It is recommended that Requests be created under a Project – so that there is the logical association of Requests to Projects. There are two personas shown below: Admin User who creates the Request and a regular user who completes the Request.
To create a Request, touch the + icon.
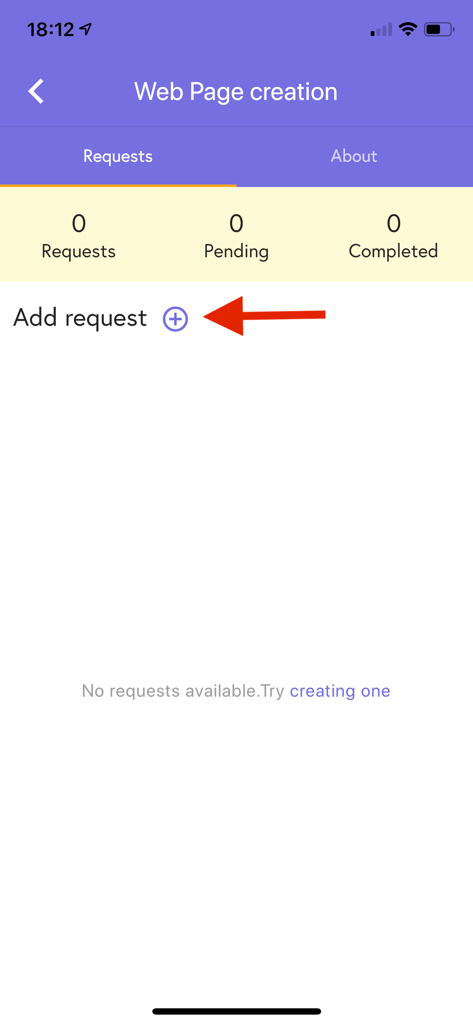
Now enter all the relevant information for the Request – including the Start Date and End Date, the total number of hours and number of volunteers needed.
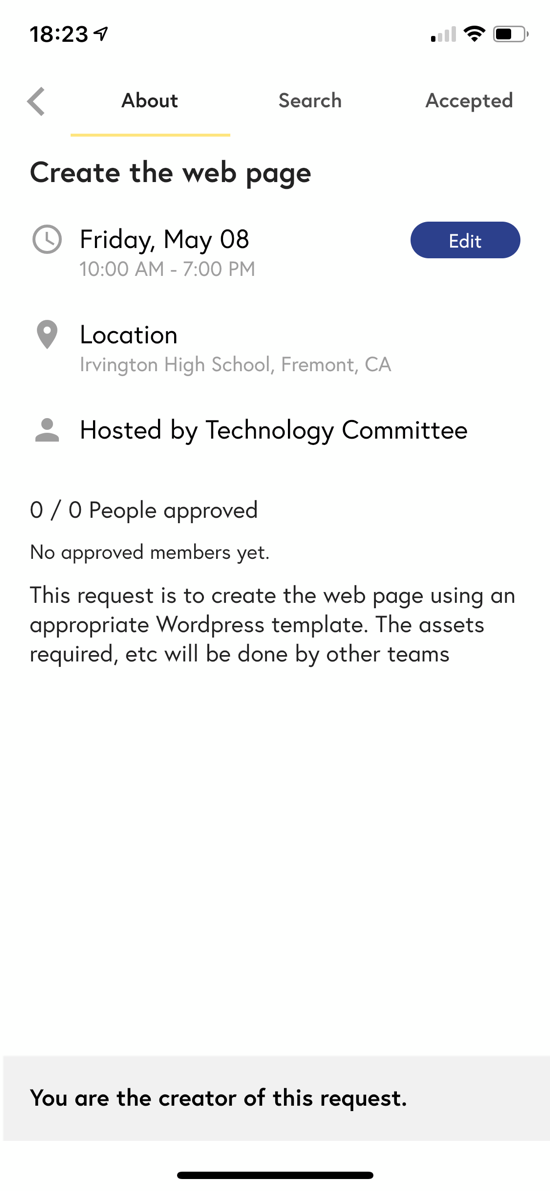
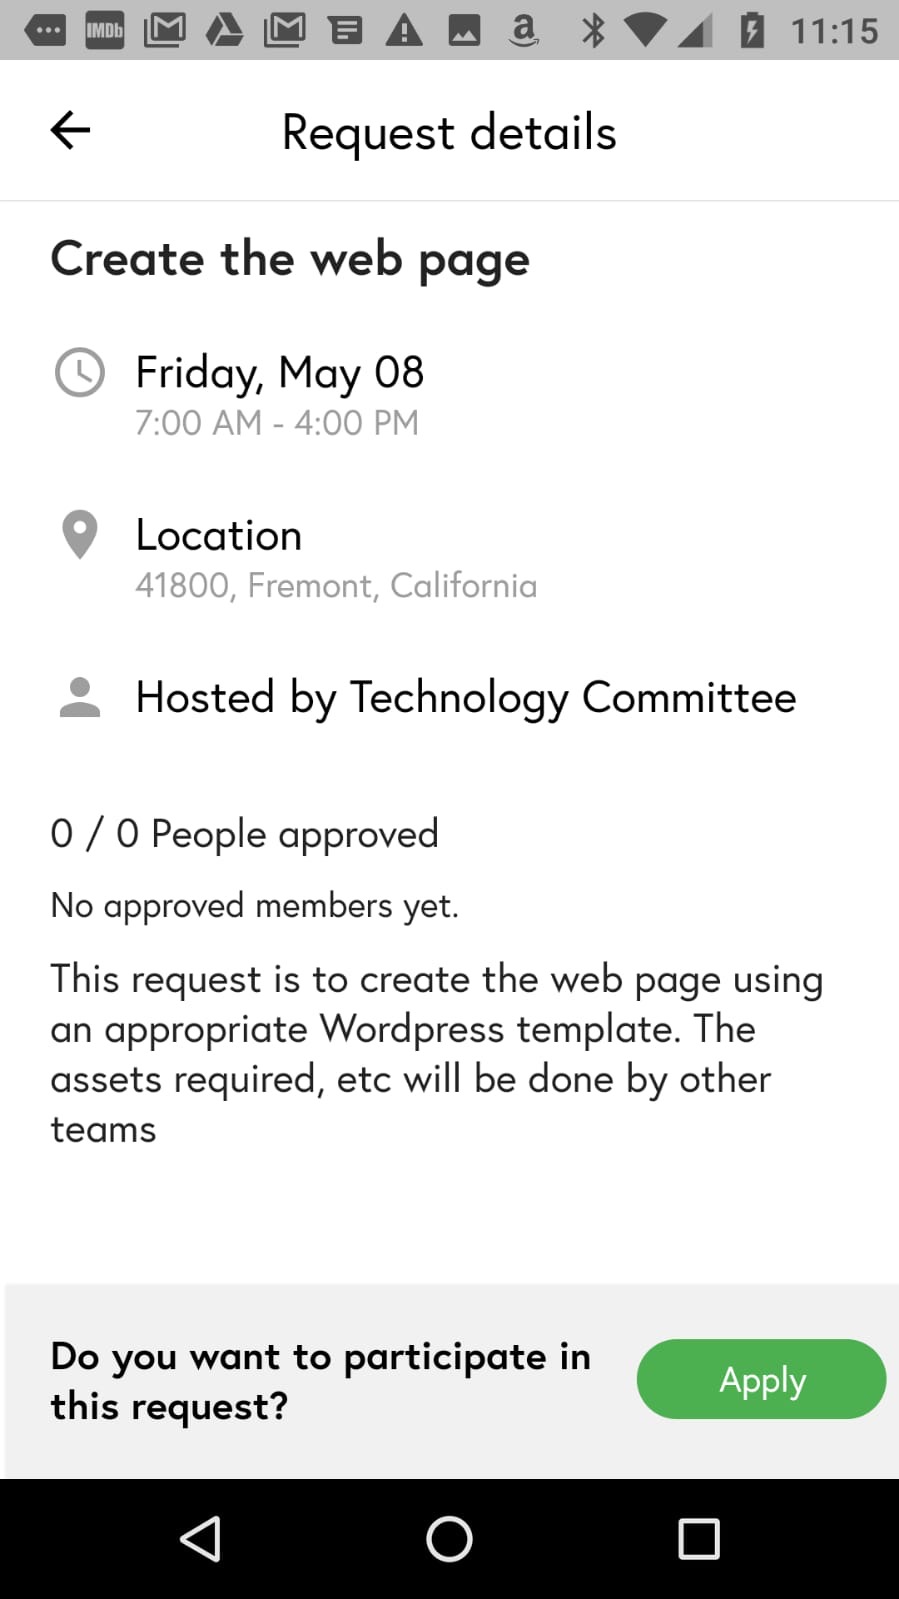
Once the request is created, it is visible to the members of the Group. Note that the user should have joined the Group (from the Explore tab). This the screen that the Group’s members would see:

Upon tapping the Request, they have the option to Apply for the Request:
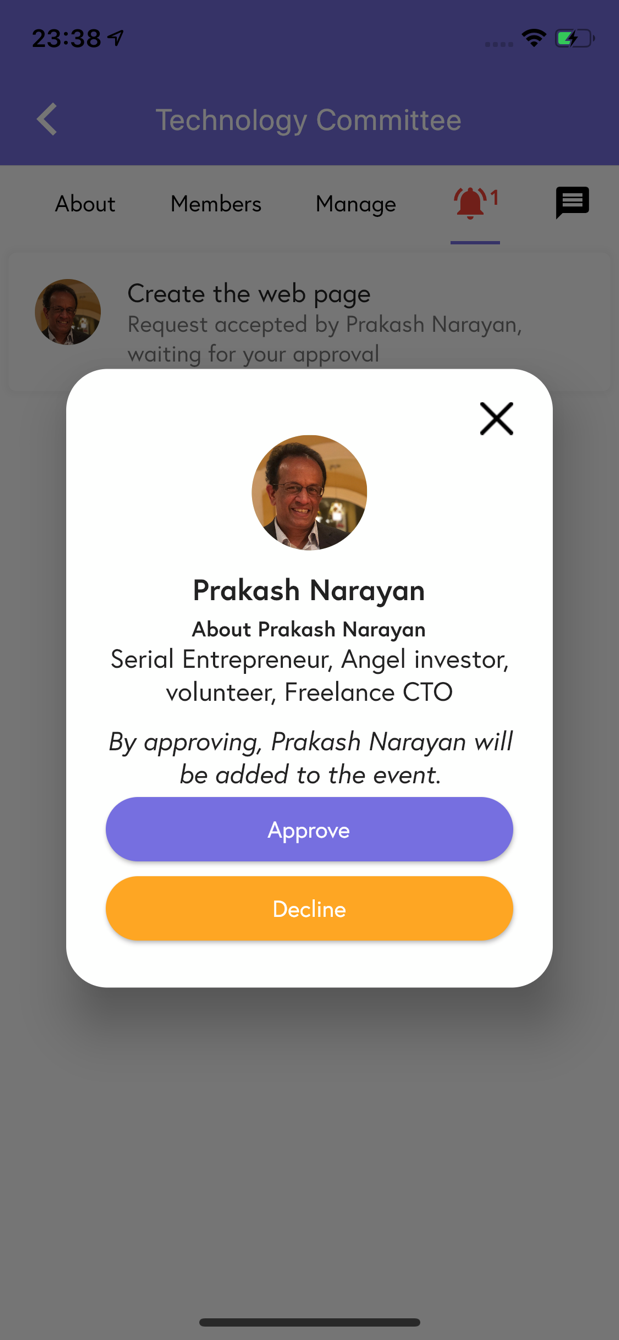
Once a Member applies for a Request, the creator of the Request, receives a (group) notification. Note that a “Group” notification is different from a “Personal” notification. Scroll to the right most tab to see the Group notifications:
From the notification, they can Approve or Decline the application:
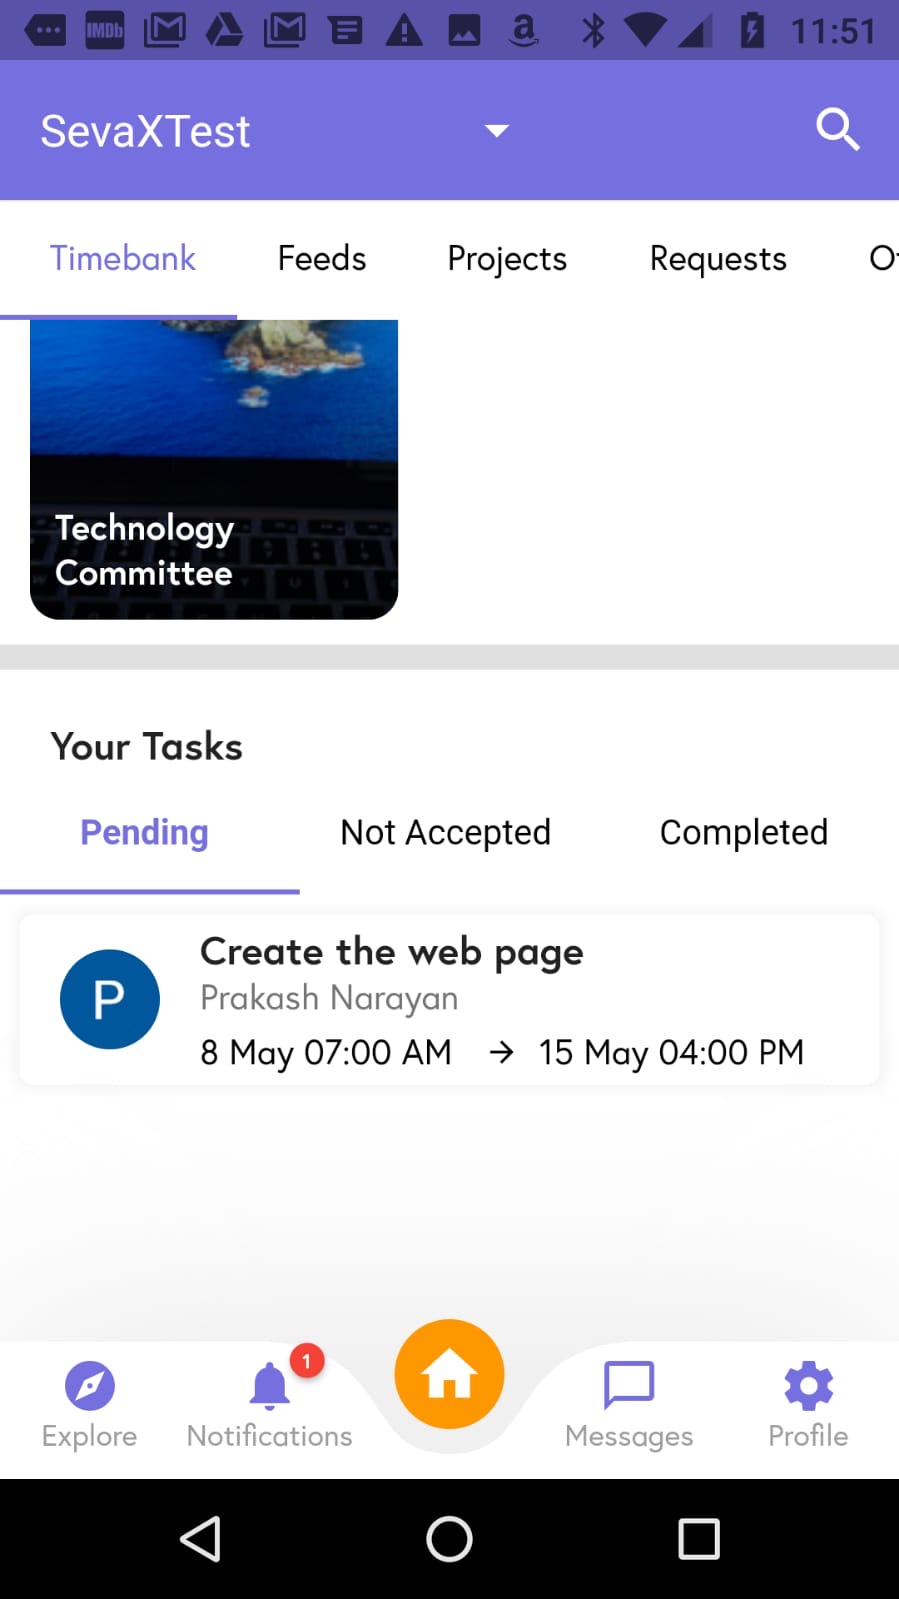
Once the approval is given, it is seen by the person who applied for this Request under the “Your Tasks” tab.
Once the Request is completed, they can tap on the Request and mark it Complete.

The Request Creator receives another notification to approve the hours claimed. Once it is approved, the Seva Credits are received by the person completing the Request.